


Reese Friction Sway Control Kit w/ Ball Plate Hardware Ball and Sway Control Bracket for 2" Ball Mounts Class 3 and 4
Model: 83660 26003Friction Sway Control uses friction to resist pivotal movement and thereby works against the effects of induced sway. It operates on the principle of "stiffening" the coupling between the tow vehicle and trailer. The degree of "stiffening" or friction is adjusted to suit various trailer weights and towing conditions. Its operation is simple and uncomplicated. It doesn't prevent the generation of sway; it simply works to resist the forces once they have started.
Installs and removes easily
Removes with two spring locking pins
Heavy construction for added reliability
Friction brake keeps trailer and tow vehicle stable
Quick attachment to trailer frame and ball mount
Can be used on left and right side of trailer
Sway Control Specs:
| Part Number | 83660 |
| Brand | Reese |
| Ball Shank Length | 1-1/4" |
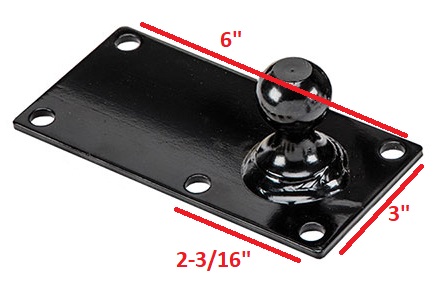
| Ball Plate Dimensions | 6" Length 3" Height |
| Warranty | 10 Year |
| Installation Instructions |
Sway Control Adapter Bracket Features:
Easy bolt-on installation. This bracket will attach to your Ball Mount to provide an attachment point for the sway control ball. The ball will secure the plate to the Ball Mount
Sway Control Adapter Bracket Specs:
| Part Number | 26003 |
| Brand | Reese |
| Application | Class III IV or V 2" x 2" Ball Mount |
| Ball Hole Diameter | 1" |
| Sway Ball Hole Distance | 5-1/2" from ball hole to sway ball hole |
| Metal Thickness | 3/8" |
| Installation Instructions |
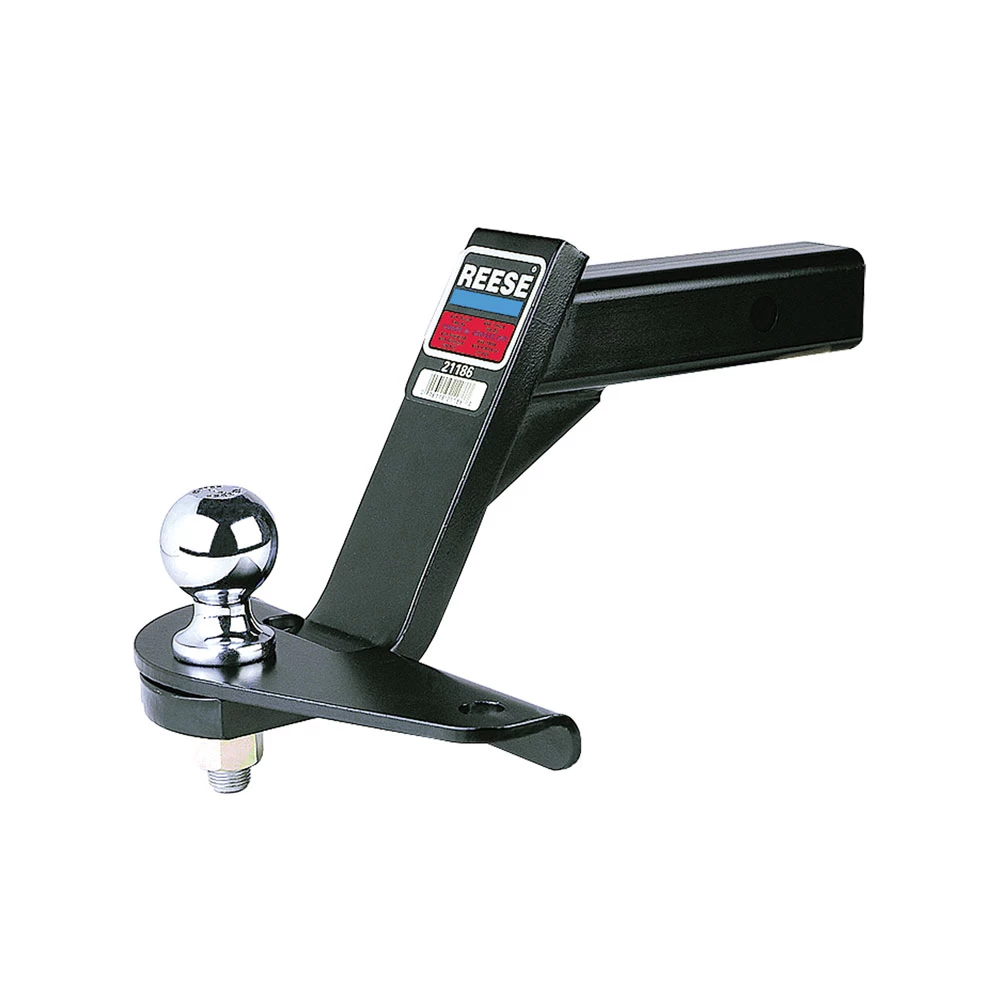
Ball Mount is not included!
WHY CHOOSE REESE WEIGHT DISTRIBUTION SYSTEMS?
$103 68 $122.68 15% OFF
- Best Price on Web Guarantee
- Fastest Shipping
- FREE Shipping
- In Stock
We match lower prices from major authorized retailers for brand-new products in original packaging, provided the item is in stock. The competing seller must be an authorized, professional retail business; offers from
individuals, auctions, peer-to-peer sites, or unauthorized sellers don’t qualify. Used, refurbished, or open-box items are excluded.
Please see our full terms for details.
$122.68 $103 68
Questions? Call our Auto Experts at (877) 869-6690
Get it now, pay later
Select installments at checkout to split your purchase into 4 interest-free payments of $25.75 every 2 weeks.
- No fees, ever.
- No impact on your credit score.
Payment options are offered by Affirm and are subject to an eligibility check and might not be available in all states. CA Residents: Loans by Affirm Loan Services, LLC are made or arranged pursuant to a California Finance Lender license.
Installments in partnership with
![]() .
Affirm and its offerings are supported in English only. Translations are not provided by Affirm.
.
Affirm and its offerings are supported in English only. Translations are not provided by Affirm.
Product Details
- Brand: Reese
- Model: 83660 26003
- Includes: Friction Sway Control Kit w/ Ball Plate
Description
Friction Sway Control uses friction to resist pivotal movement and thereby works against the effects of induced sway. It operates on the principle of "stiffening" the coupling between the tow vehicle and trailer. The degree of "stiffening" or friction is adjusted to suit various trailer weights and towing conditions. Its operation is simple and uncomplicated. It doesn't prevent the generation of sway; it simply works to resist the forces once they have started.
Installs and removes easily
Removes with two spring locking pins
Heavy construction for added reliability
Friction brake keeps trailer and tow vehicle stable
Quick attachment to trailer frame and ball mount
Can be used on left and right side of trailer
Sway Control Specs:
| Part Number | 83660 |
| Brand | Reese |
| Ball Shank Length | 1-1/4" |
| Ball Plate Dimensions | 6" Length 3" Height |
| Warranty | 10 Year |
| Installation Instructions |
Sway Control Adapter Bracket Features:
Easy bolt-on installation. This bracket will attach to your Ball Mount to provide an attachment point for the sway control ball. The ball will secure the plate to the Ball Mount
Sway Control Adapter Bracket Specs:
| Part Number | 26003 |
| Brand | Reese |
| Application | Class III IV or V 2" x 2" Ball Mount |
| Ball Hole Diameter | 1" |
| Sway Ball Hole Distance | 5-1/2" from ball hole to sway ball hole |
| Metal Thickness | 3/8" |
| Installation Instructions |
Ball Mount is not included!
WHY CHOOSE REESE WEIGHT DISTRIBUTION SYSTEMS?
Get Expert Help
Reese Friction Sway Control Kit w/ Ball Plate Hardware Ball and Sway Control Bracket for 2" Ball Mounts Class 3 and 4 Install Notes
Installation Instructions for Sway Control System ## Part Number - 83660 --- ## Tools Required - Drill Bits: 11/32” for 1/8" or thicker material, 9/32” for thinner material - Torque Wrench (capable of 100 ft-lbs) - Grease - Center Punch --- ## Hardware List 1. Ball Assembly: - 1a. Sway Control Ball - 1b. Hex Nut (5/8-11) - 1c. Lock Washer 2. Fastener Kit: - 2a. Self-Tapping Screws (#24-9 X 1) - Qty: 6 - 2b. Clips - Qty: 2 3. Ball/Plate Assembly 4. Bar for Ball Mounting (sold separately) 5. Handle (On/Off) 6. Slide Bar 7. Bolt (Tension Adjusting) 8. Compression Plate Assembly 9. Hardened Washer 10. Main Body Assembly --- ## Step-by-Step Installation Instructions ### 1. General Installation 1. Positioning the Vehicle and Trailer: - Connect the trailer to the tow vehicle. - Align the vehicle and trailer in a straight line on a level surface. 2. Mounting the Sway Control Ball: - Mount the sway control ball (1a) using the hex nut (1b) and lock washer (1c) to the hitch. - Torque the nut to 100 ft-lbs. - If necessary, notch and weld the ball mounting bar (4) into the proper position. 3. Marking and Drilling Holes on the Trailer Tongue: - Measure and mark a point on the trailer tongue 24” from the center of the hitch ball. - Align the ball/plate assembly (3) with the mark and center punch four hole locations. - Drill four holes using the appropriate drill bit for the trailer tongue thickness. 4. Securing the Ball/Plate Assembly: - Position the ball/plate assembly (3) over the drilled holes. - Drive four self-tapping screws (2a) through the plate into the trailer tongue. - Drill the remaining two holes and secure them with screws. ### 2. Hook-Up 1. Lubricating and Attaching Slide Bar: - Lubricate both sway control balls with grease. - Place the socket of the slide bar (6) over the hitch ball (1a) and secure it with a clip (2b). - Extend the sway control assembly and place the other socket over the ball on the trailer. Secure it with another clip (2b). 2. Tension Adjustment: - Loosen the handle (5) until the slide bar can move freely. - Retighten the handle until it stops and returns to its original level position. 3. Preventing Damage: - Slowly back the vehicle into a jackknife position to check for potential contact or bottoming out of the sway control. - If contact is likely, remove the sway control before backing the trailer. ### 3. Adjustment - Perform road tests with the loaded trailer to adjust the tension: - Turn the adjusting bolt (7) in 1/4-turn increments to increase or decrease tension. - For large trailers, a second sway control unit may be necessary. ### 4. Unhooking 1. Turn the on/off handle counterclockwise to release tension. 2. Remove both clips (2b) and detach the sway control. --- ## Maintenance 1. Clean the friction surfaces of the slide bar (6) with a wire brush after the first 1,000 miles and then every 10,000 miles. 2. Never paint or lubricate the slide bar. 3. Inspect all hardware periodically for wear or damage. --- ## Safety Notes 1. Vehicle Stability: - Avoid towing with improper trailer loading. Heavy items should be on the floor in front of the axle. - Maintain tongue weight at 10-15% of the gross trailer weight. 2. Hazardous Conditions: - Reduce sway by turning the handle counterclockwise during wet, icy, or gravel road conditions. 3. Speed Control: - Never speed up if sway occurs. Reduce speed and investigate the cause. --- ## Manufacturer Details - Company: Cequent Performance Products - Contact: (888) 521-0510 - Document Revision: 83660N, 1-15-09, Rev A
Installation Instructions for Sway Control System
Part Number - 83660
Tools Required
- Drill Bits: 11/32” for 1/8" or thicker material, 9/32” for thinner material
- Torque Wrench (capable of 100 ft-lbs)
- Grease
- Center Punch
Hardware List
- Ball Assembly:
- 1a. Sway Control Ball
- 1b. Hex Nut (5/8-11)
- 1c. Lock Washer
- Fastener Kit:
- 2a. Self-Tapping Screws (#24-9 X 1) - Qty: 6
- 2b. Clips - Qty: 2
- Ball/Plate Assembly
- Bar for Ball Mounting (sold separately)
- Handle (On/Off)
- Slide Bar
- Bolt (Tension Adjusting)
- Compression Plate Assembly
- Hardened Washer
- Main Body Assembly
Step-by-Step Installation Instructions
1. General Installation
- Positioning the Vehicle and Trailer:
- Connect the trailer to the tow vehicle.
- Align the vehicle and trailer in a straight line on a level surface.
- Mounting the Sway Control Ball:
- Mount the sway control ball (1a) using the hex nut (1b) and lock washer (1c) to the hitch.
- Torque the nut to 100 ft-lbs.
- If necessary, notch and weld the ball mounting bar (4) into the proper position.
- Marking and Drilling Holes on the Trailer Tongue:
- Measure and mark a point on the trailer tongue 24” from the center of the hitch ball.
- Align the ball/plate assembly (3) with the mark and center punch four hole locations.
- Drill four holes using the appropriate drill bit for the trailer tongue thickness.
- Securing the Ball/Plate Assembly:
- Position the ball/plate assembly (3) over the drilled holes.
- Drive four self-tapping screws (2a) through the plate into the trailer tongue.
- Drill the remaining two holes and secure them with screws.
2. Hook-Up
- Lubricating and Attaching Slide Bar:
- Lubricate both sway control balls with grease.
- Place the socket of the slide bar (6) over the hitch ball (1a) and secure it with a clip (2b).
- Extend the sway control assembly and place the other socket over the ball on the trailer. Secure it with another clip (2b).
- Tension Adjustment:
- Loosen the handle (5) until the slide bar can move freely.
- Retighten the handle until it stops and returns to its original level position.
- Preventing Damage:
- Slowly back the vehicle into a jackknife position to check for potential contact or bottoming out of the sway control.
- If contact is likely, remove the sway control before backing the trailer.
3. Adjustment
- Perform road tests with the loaded trailer to adjust the tension:
- Turn the adjusting bolt (7) in 1/4-turn increments to increase or decrease tension.
- For large trailers, a second sway control unit may be necessary.
4. Unhooking
- Turn the on/off handle counterclockwise to release tension.
- Remove both clips (2b) and detach the sway control.
Maintenance
- Clean the friction surfaces of the slide bar (6) with a wire brush after the first 1,000 miles and then every 10,000 miles.
- Never paint or lubricate the slide bar.
- Inspect all hardware periodically for wear or damage.
Safety Notes
- Vehicle Stability:
- Avoid towing with improper trailer loading. Heavy items should be on the floor in front of the axle.
- Maintain tongue weight at 10-15% of the gross trailer weight.
- Hazardous Conditions:
- Reduce sway by turning the handle counterclockwise during wet, icy, or gravel road conditions.
- Speed Control:
- Never speed up if sway occurs. Reduce speed and investigate the cause.
Attention:
This is a summary of the installation procedure. For complete installation instructions, including diagrams and detailed information from the manufacturer, please download the full installation PDF.
Technical Support:
For technical support and assistance, our team of experts is available to help. You can reach our tech support by visiting www.trailerjacks.com or calling 877-869-6690.
Warranty:
The product comes with a [X]-year warranty that covers defects in materials and workmanship. For complete warranty instructions, please download the full installation PDF.
Related Products


People Also Bought


-250x250.webp "Reese Standard 2-5/16\" 14,000 lbs Trailer Hitch Tow Ball 1-1/4\" Shank Diameter x 2-3/4\" Shank Length Heavy Duty Chrome")


